Given the dispersed nature of the workforce, team working and collaboration has never been more important nor more challenging. Thankfully, pascom users have all the required tools at their fingertips to continue working effectively and productively with teams, project groups and external collaborators. The purpose of this article is to provide a quick overview of how to create, setup and use the pascom Team Collaboration tools to help you take your team collaboration to the next level.
Getting Started With Team Collaboration
Before we go any further, there are a few important things to know. Firstly, pascom’s Group tools are the basis of all collaboration functionality, whether that be Team Messaging, Audio and Video Conferencing or Web Meetings and Screen Sharing - all the tools can be found in one place. Secondly, you can add as many collaboration groups as you require, which is good news because it’s a well known fact that working in smaller teams is actually far more effective. It is also worth mentioning, that while all the images in this guide are from the pascom desktop application, the process is exactly the same on your mobile device.
Step 1 - Create & Setup a Collaboration Group
Creating a collaboration group is really simple, all you need to do is press the plus symbol  in the profile section of the client (left, above the contact list).
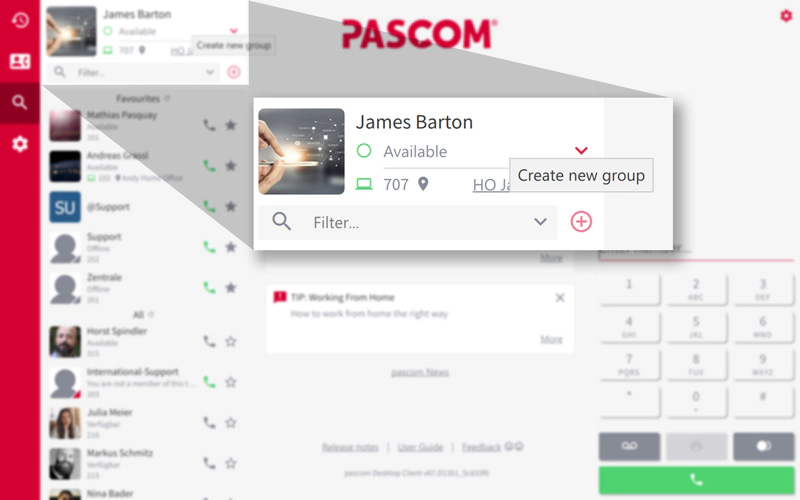 Add new pascom Group
Once open, you will need to enter a group name and can customise the group. Make it stand out in the contacts roster by adding a profile picture. If you do not add a picture, the profile image will be automatically set to the first two letters of the name or the first letter of the first two words (if the name has mutliple words).
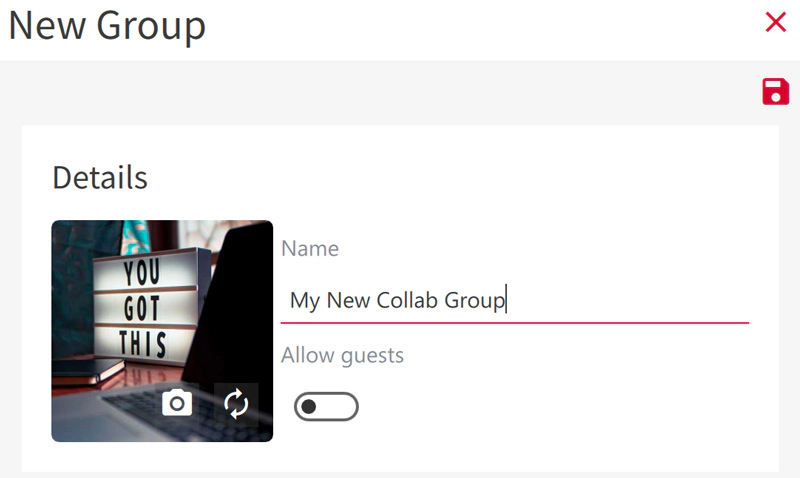 Customise pascom Group
Step 2 - Add Participants
The next step to improving team collaboration is to add your internal collaborators to the group. All available participants are listed in the Select Participants section. If the list is particularly long, the filter function allows you to search for specific colleagues. If you forget someone, don’t worry they can always be added aftwards.
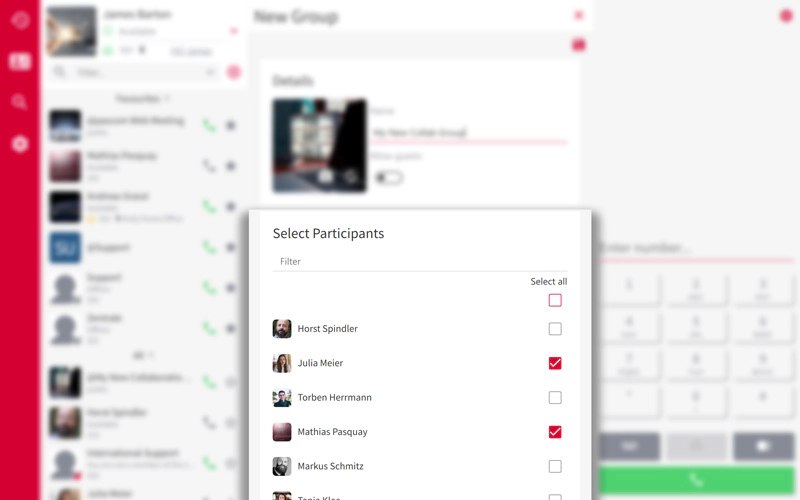 Add pascom Group Pariticipants
Next, you need to consider whether the group needs to be accessible to external participants. If so, move on to step 3. If not, press the disk symbol  to save your group which will now up and running and ready to be used.
Step 3 - Invite External Participants
The pascom Collaboration tools are not only ideal for employee and team collaboration, but are the perfect for incorporating customers and external participants (freelancers, business partners and so on) in to your business meetings - you just need to be able to invite them.
Firstly, you will have to set the group to public using the allow guests switch. Simply toggle the switch right to turn on (red) the public mode enable guests to join using their browsers.
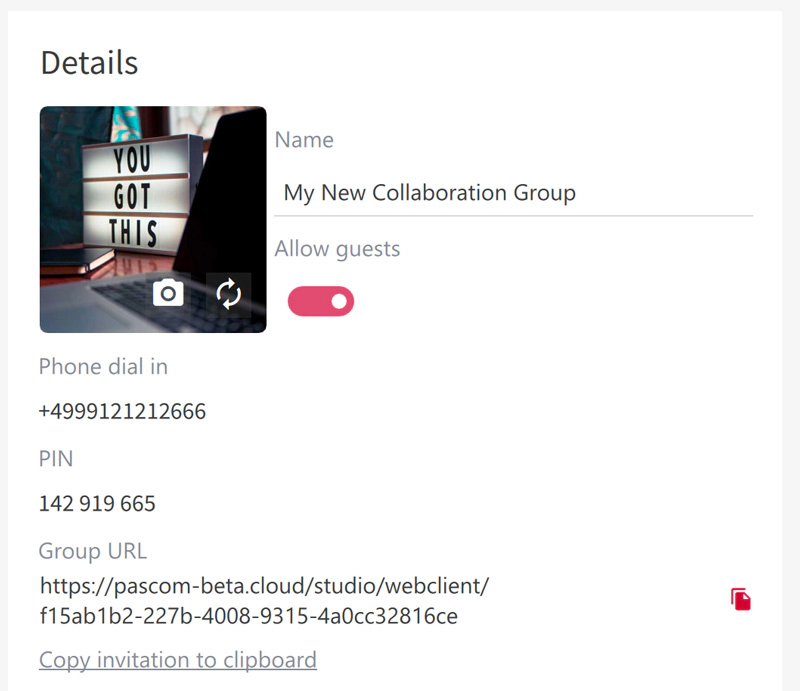 pascom Group Web Meetings
Next, to copy the invite in full press the copy to clipboard button. Alternatively, it is possible to copy only the web meeting link by clicking the clipboard icon  .
.
Phone Dial-in
If the following red error messages appears, it’s not your fault - it is simply that the phone dial option has not been configured by your phone system administrator.
 pascom Group Phone Dial-in
You can still hold web meetings using the URL, the only difference is that participants will not be able to dial in using their phone. Giving your guests the option to dial in is recommended, so you should send your phone system admin a quick chat message with the link to our documentation: https://www.pascom.net/doc/en/clients/webclient-configuration/ and ask them to set it up for future meetings.
Step 4 - Make Your Group a Favourite
The final step is is not essential, but we do recommend making your new group a favourite by clicking the star symbol next to the groups entry in the roster. Making an object a favourite ensures that they are always listed in the upper part of the client contact list. In the case of groups, doing so ensures that the group is more visible and easier to find.
 Make pascom group a favourite
What’s more, as soon as there is any sort of telephony / video action in the group, the room turns green in the contact list which is then only visible if it is above the scroll line within the contact list.
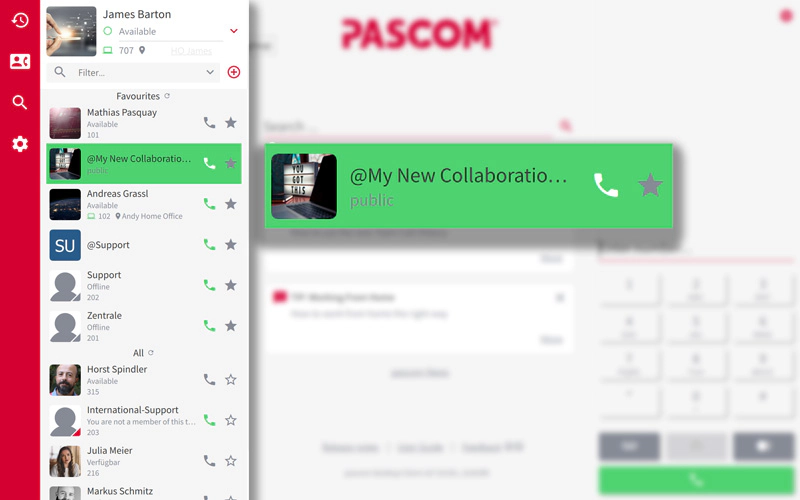 Active pascom group
If a new instant message is received, the room will spring to the top of the list and the message indicator will be clearly visible.
 pascom Team Messaging
Get Collaborating
Now that you’ve finished setting up your collaboration group, it’s time to get collaborating, so let’s take a look at all the tools available to you.
Team Messaging
The first collaboration tool that is instantly available to all internal group members is Team Messaging. All you need to do is enter your message in the chat box, just as you would for a normal chat / instant message.
As mentioned above, new messages will trigger the entry in the contact list to spring to the top as well as a new message counter being display both on the entry plus on your profile picture.
 pascom Group Collaboration - send new message
Audio Conferencing
Starting an audio conference is simple. All you need to do is click on the green phone icon  next to the group’s entry in the contact list.
Alternatively, if you are actively using the group for an instant messaging brainstorming session, simply clicking either the phone symbol next to the chat box or under the softphone dial-pad will also call the group - using the dial pad requires a double clicks: one click to load the group extension, the second to call the group.
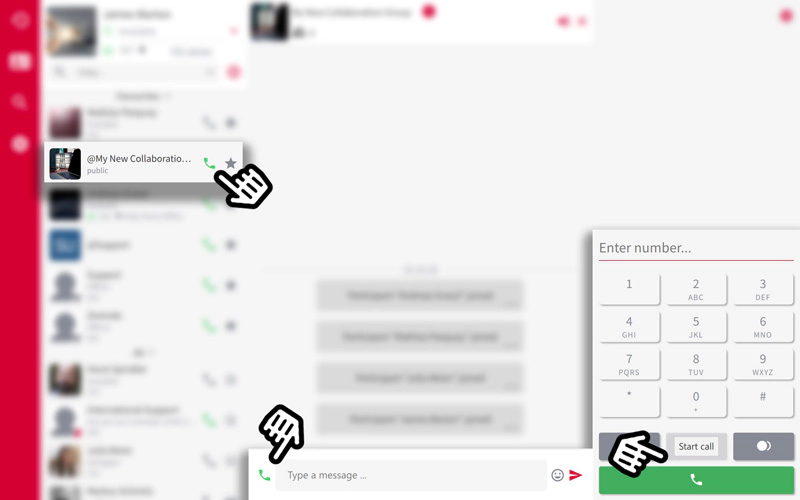 pascom Group Collaboration - audio conferencing
As soon as the call is active, the group’s entry in the contact list will turn green for both you and other internal group members, thus notifying them that a conference has started. By opening the group within the client, you will be able to instantly see who is already active within the call.
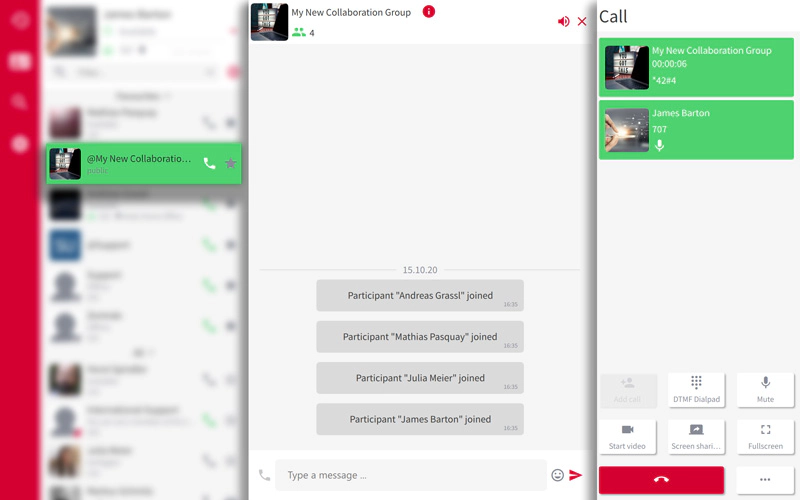 pascom Group Collaboration - audio conferencing
Elevate to a Video Conference
Video should now be your go-to first choice when collaborating with colleagues. This is even more important these days due to the workplace separation working from home inevitably causes. For more information on how to run productive and engaging video meetings, please refer read our recent posts: How to run great and effective virtual meetings and How to run engaging video meetings.
To start a video call, simply click the start video button that is found in the phone section and hey presto, you’re in a video meeting.
Obviously, before you start the call it is wise to check that your web camera is correctly configured. This can be done within the client settings menu as shown here:
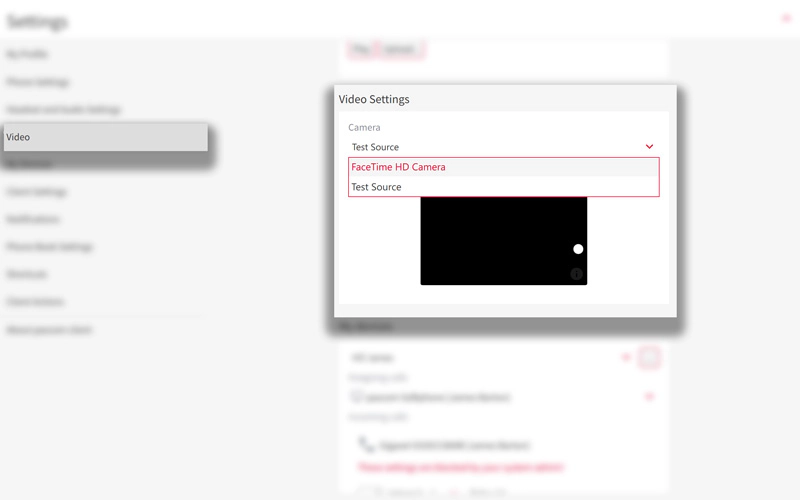 pascom Group Collaboration - Video conferencing
Get Detailed with Screen Sharing
Some topics are too complex to explain with words alone. What’s really needed is the visual aspect of communication. While video goes a long way thanks to being able to read facial expressions and body language, screen sharing* takes this even further allowing meeting moderators to deliver virtual presentations, explaining complex topics and deliver product demonstrations online.
If, as is likely, you are already in a video conference, sharing your screen is done using the conference control menu. Simply move your mouse and the menu will appear. Next, click the laptop symbol.
 pascom Group Collaboration - screen sharing
If you are single monitor, this screen will automatically be shared. However, should you use multiple monitors, you can choose which screen to share as shown here:
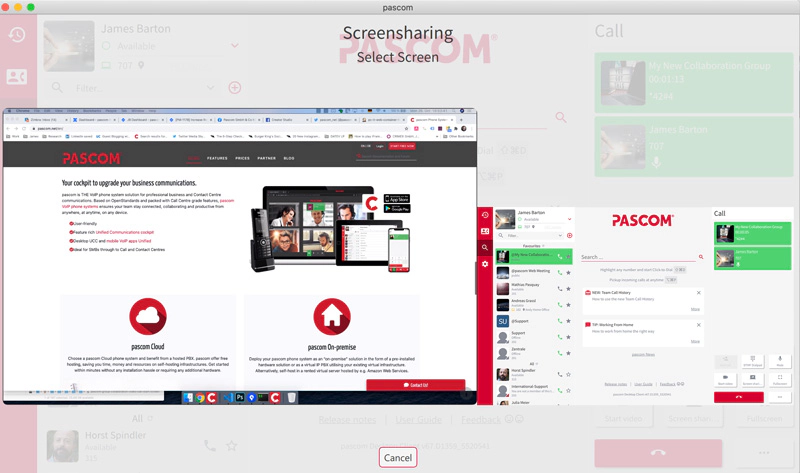 pascom Group Collaboration - select screen share
Should you only be in an audio conference, then simply click the share screen button in order to share your screen:
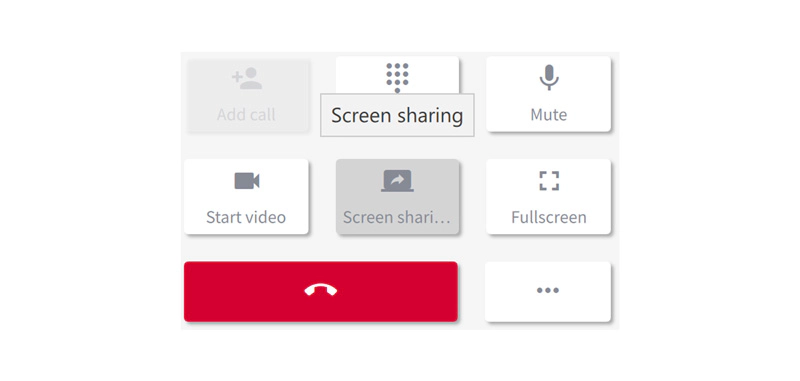 pascom Group Collaboration screen sharing
*mobile users can currently view screenshares but not share their screen
Firstly, when collaborating with external participants it is worth noting that you, as a pascom user, do not need to alter your worklow. All the steps and tools are the same as described above. The only difference is that your meeting participants will join by using their web browser. That said, understanding how the pascom web meeting suite works is important so that you can then help your guests should they encounter issues logging in to a meeting - this should not happen often as even my Dad, the biggest technophobe around, can do it!
Invite External Participants
If you haven’t already done so (s. step 3 above), now is the time to copy the invitation and send it to your intended participants. The invitation can be found by clicking on the info symbol within the group overview:
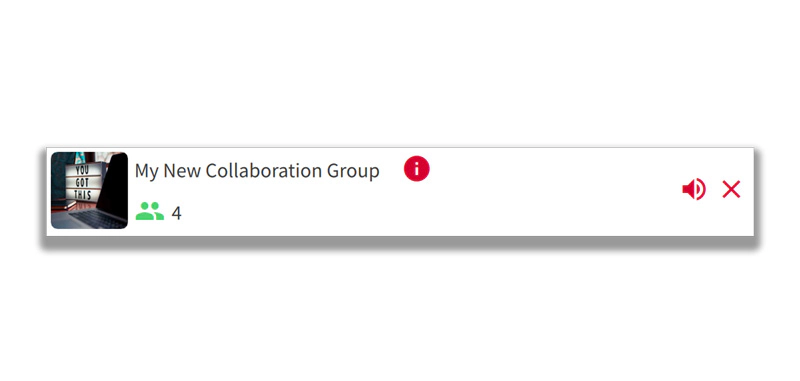 pascom Group Collaboration - Web Meeting Participants
Once they click on the link, their browser will take them to the correct meeting room.
Logging in via Web
When a participant enters a pascom web meeting room, they will first be prompted to enter their name.
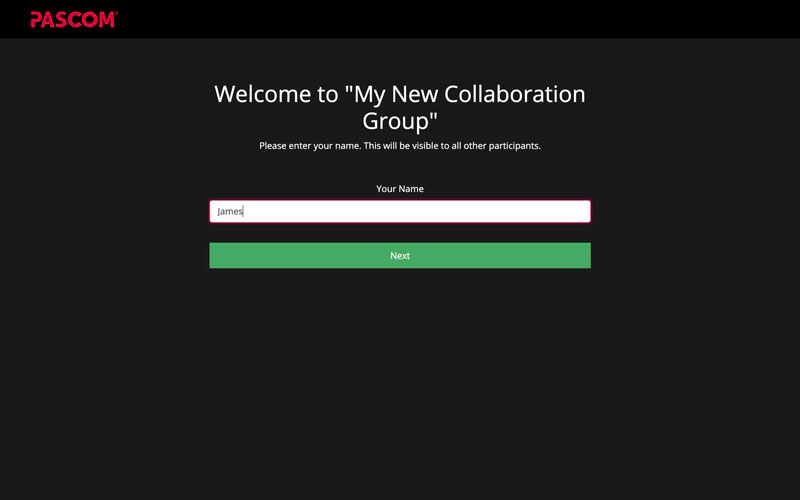 pascom Group Collaboration - Web Meeting Login
Next, the meeting room may request browser permission to access their mircophone and camera - this depends on whether this is already granted or not.
The final log in step is for the participant to is setup their video and audio options by selecting their preferred camera and microphone options. If a participant wishes to join using dial-in audio, they will need to select the phone option (this requires the phone dial-in option to be configured - s. step 3 phone dial-in) and press join.
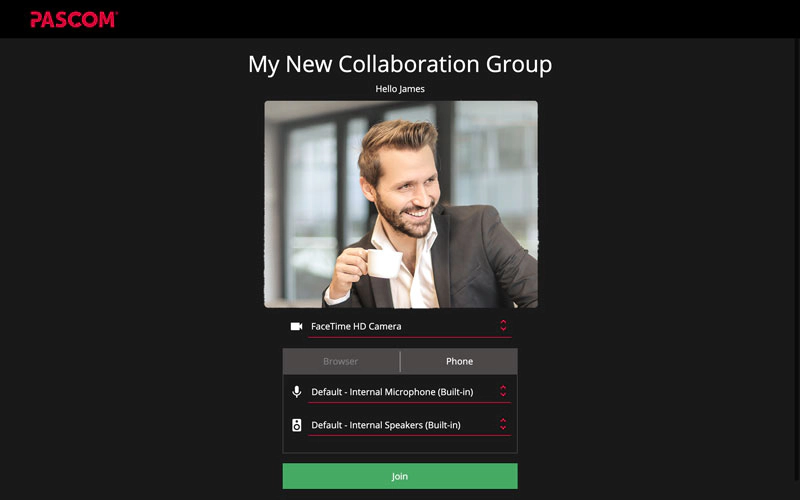 pascom Group Collaboration - Web Meeting AV setup
Once done, the participant will be directed to the meeting room. Should a moderator not yet have entered the meeting, all guests will be held in the “lobby” and will enjoy their time their listening to some relaxing music.
At this point, meeting moderators will be notified that guests have entered the meeting room as the Group entry in the contacts list will turn green and all new participants will be listed in the Group overview panel.
Starting a Web Meeting
To start a web meeting, a moderator (i.e. you or another pascom client user who is a member of the group) must enter the meeting room by dialing into the group as you would for an internal collaboration session.
As a moderator, you will have access to all the collaboration tools described above meaning you can chat with your guests using instant messaging, join using audio and video as well as sharing your screen.
Guests have the ability to see who else is in the meeting  , can of course chat
  with all meeting participants plus controlling their video and microphones to turn video on or off and mute / unmute themselves using the meeting control menu:
 pascom Group Collaboration - Web Meeting Controls
Et voila - you’re all good to give your team and external communication a collaboration efficiency boost.
Detailed User Guides
As a further source of information, we’ve updated our phone system documentation with some useful user guides which are written specifically for end users.
They cover every aspect of the pascom desktop and mobile apps, so are definitely worth checking out:
We’re here to help
If you have any queries about pascom phone system features and how to use them, then check out some more Video Collaboration posts as well as our desktop client, mobile app and web client user guides as link above.
If you, your team, your colleagues or customers could benefit from an effective all-in-one video and business collaboration solution, then we’re here to help. Just give us a call on +49 991 291691 0 and get started with our free cloud phone system edition.
Claim Your Free Phone System